
Complete Guide to Storyboarding with Tools and Examples
Jan 4th, 2024


Behind every compelling visual narrative, from movies to animations and advertisements, lies a critical behind-the-scenes tool - a storyboard. It is, in essence, a storyteller's blueprint. Think of it as a bridge between a creator's imagination and the final product on screen. By providing a visual representation of the narrative's flow, a storyboard enables filmmakers, animators, and video producers to meticulously plan each shot, ensuring that their vision is effectively communicated.
Storyboarding provides the opportunity to streamline the creative process. Video producers can reduce the chances of expensive reshoots, revisions, and inconsistencies by carefully planning out the visuals before shooting. A storyboard is a communication tool that allows a team to visualize and align the project's direction, resulting in a more efficient workflow. In this article, we'll explore how a storyboard, with its organized panels and detailed descriptions, empowers creators to bring their narratives to life.
What is a storyboard?
A storyboard is a graphic representation of a narrative that demonstrates the events of a movie, animated video, or other multimedia project in a precise order. It typically consists of panels with illustrations, photographs, or reference images depicting individual scenes. These panels are complemented by notes and descriptions, articulating the actions, dialogues, and camera angles for each shot.
Storyboarding has roots in the animation industry and has since become a crucial tool for conveying visual narratives across a range of media platforms. Before filming the video, production teams use storyboards to make sure the plot is logical, coherent, engaging, and does not contain any mistakes. Although creating a storyboard may seem optional, it is an essential stage in video production as it can help avoid unnecessary expenses or delays.
A storyboard serves as a roadmap when making a video. Similar to a script, it provides a direction and guides you through the production process. By having a plan for a video, you can understand how to create the shots before filming. With a storyboard, you can explain and share your ideas with other team members. In addition, it saves time, as making revisions to a storyboard is easier than changing the entire video.
Storyboard elements
Each shot of a storyboard contains the following elements: frames or panels, shot descriptions, camera movements, dialogues, and scene numbers. We will provide a more in-depth explanation of these components below.
Frames or panels. These are the visual representations of individual shots or scenes that form the essence of the storyboard. Each frame corresponds to a particular action or moment in the video. Moreover, the panel's shape represents the shot’s aspect ratio. Typical aspect ratios include 16:9, 2.39:1, and the wider IMAX format.
Shot descriptions. Descriptions convey details about camera angles, shot size, character movements, and crucial visual elements. They help the production team understand how to capture each scene.
Dialogue and text. Including dialogue or text helps communicate what the characters say in each shot and provides additional information about their interactions. This element also contains instructions on how characters should move, react, or convey emotions.
Scene numbers or labels. Assigning scene numbers or labels ensures that the sequence remains coherent and organized, making it easier to follow and execute the narrative in order. Each scene should align with a description and adhere to the chronological order outlined in your script.
Camera movements. Arrow symbols or other annotations can be included to show the direction and movement of the camera within a shot. This helps illustrate camera pans, tilts, zooms, or other dynamic actions.
These five elements together provide a solid foundation for conveying the visuals and storytelling, allowing the production team to understand and execute the vision effectively.
How to create a storyboard?
In this section, we will consider the process of creating a storyboard. You are already familiar with the script, so your primary task is to turn it into an image form. Each panel should contain enough data so a person who sees a storyboard for the first time can understand what is going on. However, it is crucial to strike a balance and avoid excess information as it can overshadow critical details.
Step 1. Write your ideas down
Begin by clearly defining the purpose of your project and identifying your target audience. You should also determine the type of video you want to create and the reasons that would motivate people to watch it. For example, this could be an explainer video, a promotional piece, or a storytelling video. Your choice here will shape the tone and style of your storyboard. Then, write brief notes about your message, discussion points, and key takeaways.
Organize a brainstorming session with your team and generate some potential content ideas. It is difficult to predict which will turn out to be successful, so write all of them down and analyze these concepts later. In addition, determine the participants of your video, the location where it will be filmed, and the props and equipment required.
Step 2. Outline the narrative and choose key scenes
Now, you need to create an outline of the story or message you want to convey. Consider a pyramid principle if your topic is relatively complex. A goal is to provide the audience with an overview of how a story will unfold on screen. Thus, you must determine the key scenes and highlight essential elements that engage the viewer. Assign a number and an appropriate title to each pivotal moment to ensure that you can easily link them back to a broader narrative.
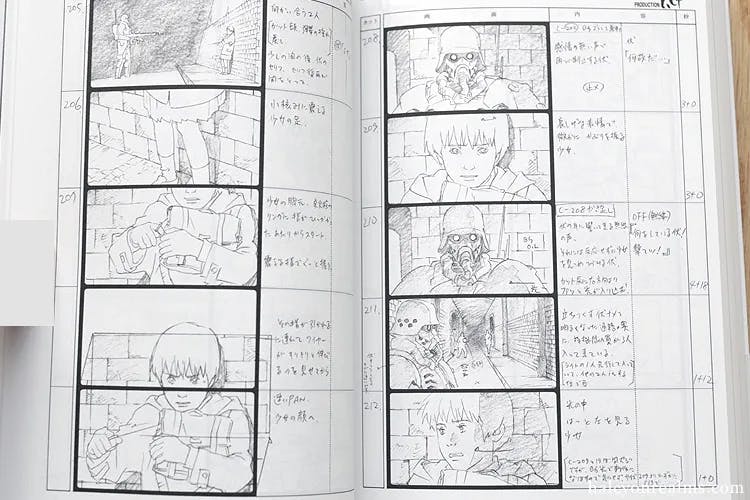
At this stage, choose the type of storyboard you want to make. There are three main types: traditional, thumbnail, and animated storyboards. Traditional storyboards are a sequence of pencil or ink drawings in a sketchbook. Thumbnail storyboards are miniature sketches that outline a video’s key scenes and visual elements and focus on capturing the composition, camera angles, and shot sequences. Animated storyboards are a dynamic form of storyboarding that utilizes basic motion, transitions, and sometimes even temporary audio elements to simulate how the final video or animation will flow.
Step 3. Sketch frames
The next step is to brainstorm the visual features of your story. If you want to create a traditional or thumbnail storyboard, make a list of the shots and draw rough sketches of them within the storyboard squares. Don't worry if you don't possess strong artistic skills; using basic shapes and stick figures is acceptable. However, if you're not achieving the desired outcome, you can collaborate with a storyboard artist. You can find this specialist on platforms like Jorgen's List, Upwork, or Fiverr.
You can also gather reference images, drawings, screen captures, photographs, and even motion clips from various sources. If you are creating an animated storyboard, use the software to add motion to objects, characters, or elements within each frame. If necessary, add temporary voiceovers, sound effects, or music to the animated frames to help convey the pace and mood of the final video.
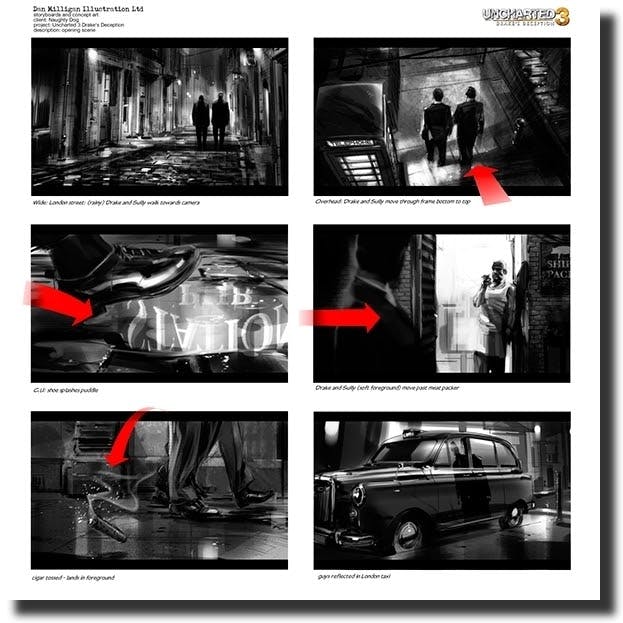
If the color plays a significant role in your project, you can include it in your storyboard. Moreover, you can create a color script. It illustrates how the color palette evolves in sync with the progression of the film's narrative. Color script resembles a storyboard but places particular focus on the psychological and symbolic aspects of color and lighting.
Step 4. Add annotations
Beneath each frame, add annotations or descriptions that explain what is happening in the scene. Include details like camera angles, character actions, movements, and dialogues. Incorporating snippets of conversation and concise scene descriptions beneath each panel helps connect your storyboard with the script. It allows conveying elements that might be challenging to express through simple drawings, such as a voiceover, the overall tone, or a character's thoughts.
Make sure to indicate motion in a traditional storyboard. For example, you can use arrows to demonstrate the direction in which a person is walking. Provide a general outline of the relevant information without delving into distracting details.
Finally, organize the frames in the order they appear in your final project. By taking the frames from your storyboard and arranging them on a timeline, along with an initial soundtrack, camera movements, and subtitles, you can estimate how your product will look.
Step 5. Review and revise
Take a step back and review your storyboard. Look for gaps in the story, inconsistencies, or areas that need improvement. Make revisions to refine your concept. Share your storyboard with a team member or a trusted friend and request their feedback. This is an excellent opportunity to see how other people view the story. Identify elements that appear confusing or unclear to them and edit the storyboard accordingly.
Create a clean and organized version of your storyboard, either digitally or on paper. Ensure it's easy to understand for all project stakeholders, including the client, camera operator, animators, and concept artists. This finalized storyboard will serve as a visual reference for the production phase of your project.
Following these five steps, you'll be well-prepared to create a storyboard that effectively communicates your project's narrative.
Storyboard examples
Let us describe several unique examples of storyboards. These examples highlight the vital role storyboarding plays in the video production process, and you can use them to learn some pro tips.
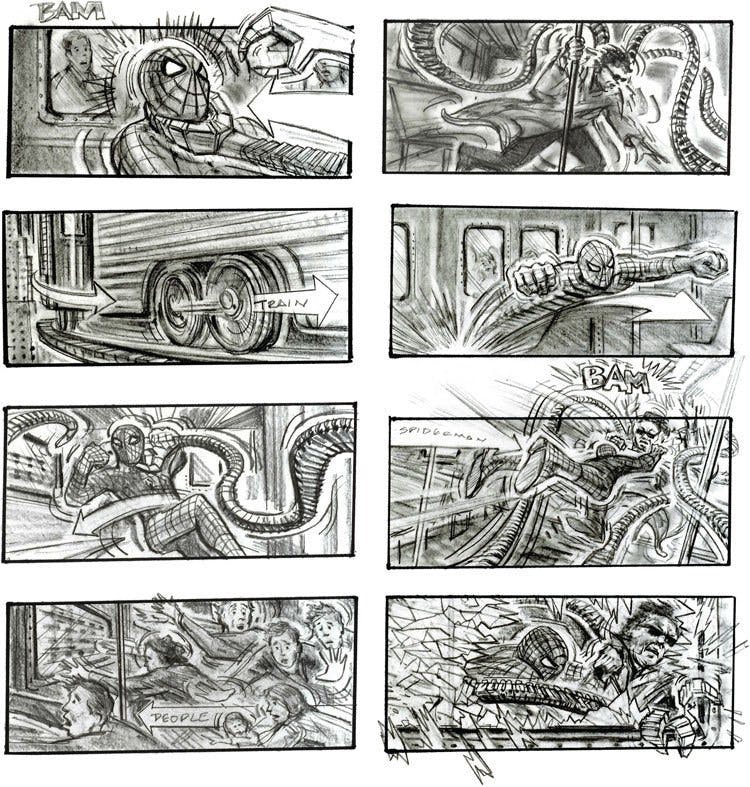
Spiderman 2
While Spiderman 2 was released in 2004, certain action scenes, even 15 years later, continue to captivate audiences. One notably breathtaking scene is the intense battle between Spiderman and Dr. Octopus on top of a high-speed train. The provided sample illustrates the movement and direction of each shot, ensuring absolute clarity for the production team regarding the desired outcome.
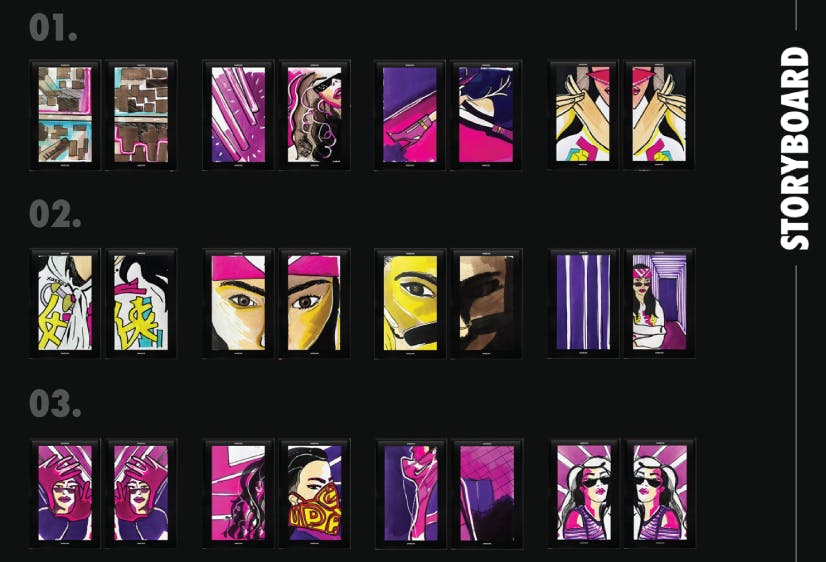
Nike Vapormask
This example outlines the precise photo sequences for a Nike Vapormask commercial. The storyboard also illustrates the composition and even the color palettes. Laura Martinez and Giulia Tornello were the masterminds behind the planning and execution of the project. In addition, the artists have included mood boards to capture the essence of the neon colors and the atmosphere portrayed in the commercial.
The Sales Matrix by Explainer Geeks
Producing explainer videos is challenging since they require condensing vast amounts of information into a concise, engaging, and visually captivating format. As an illustration of this, consider an infographic video that utilizes motion graphics animation to explain the idea of a sales matrix. This sample by Explainer Geeks proves that creating a storyboard is integral to video production.

The examples demonstrate the invaluable role storyboarding plays in various creative projects, from films and commercials to explainer videos.
Storyboard software
We will explore a variety of software tools designed to simplify the process of creating storyboards for visual storytelling, film production, animation, and more. These software options offer diverse features and capabilities, catering to the needs of both beginners and professionals in the creative industry.
Storyboarder by Wonder Unit
Storyboarder is a free and open-source software designed for creating storyboards. It simplifies the process of visual storytelling by offering a library of characters, props, and backgrounds, allowing users to quickly create the scenes without the need for extensive drawing skills. Storyboarder is compatible with Windows, macOS, and Linux, making it accessible to a wide range of users.
Key features include note-taking, script integration, and seamless export options for sharing storyboards with team members and clients. Whether you're working on films, animations, or commercials, the tool streamlines the storyboard creation process and helps turn creative ideas into videos.
StudioBinder
StudioBinder is a comprehensive cloud-based platform tailored for film and video production management. It streamlines the filmmaking process, from scheduling to storyboarding and casting. One of its main features is automated script breakdowns, allowing users to quickly identify essential elements within the script, such as scenes, characters, locations, and props.
This tool offers built-in capabilities for storyboarding and shot list creation, enhancing visualization and planning for each scene. This all-in-one solution facilitates collaboration, making it a valuable resource for filmmakers and production teams to bring their creative visions to life.
Storyboard That
Storyboard That is an online platform designed for creating storyboards, comics, and visual narratives. It is suitable for a wide range of users, from educators looking to enhance lessons with engaging visuals to professionals in the film and business industries. Storyboard That offers an extensive library of pre-made characters, scenes, and props, making it accessible even to those without advanced artistic skills. Users can drag and drop these elements onto a blank canvas, customize them, and add text to create unique storyboards.
Whether you're planning a film, explaining a complex concept, or illustrating a narrative, this platform provides a simple yet powerful interface to craft compelling visual stories. It's also cloud-based, allowing for easy collaboration and sharing of storyboards with team members, clients, or students.
In conclusion, storyboarding is the backbone of the creative process, helping to illustrate, plan, and convey a project’s narrative and visual elements. It enhances efficiency and ensures the final product aligns with the initial idea. Storyboarding is essential for translating ideas into compelling visuals, improving communication among team members, and ultimately ensuring the successful realization of their vision.